User perks are a way to give access and rewards to users of your studio. User perks are completely customizable and each studio may vary in amount and kind. Common perks include time in the studio, free firing, and discounts on supplies. They can be assigned through membership, classes, user tags, or by a studio manager manually assigning them.
Creating Your Studio’s User Perks
Before you give perks to users, you first need to create your user perks. In the Kiln Fire app, click on the Studio tab. Find the User Perks icon and click on it. In this area you can “Add Perk”. Some examples might be studio time, firing fees, or money toward supplies. You can also create your own custom text perk. You will want to choose which kind of perk, label what you want the perk to be called in your studio, and click on add perk.
NAVIGATE TO: Studio > User Perks > Create New Perk
What are Perk Expirations?
Perks can come with an expiration date if you want them to. This is optional. When setting up the perk, you can choose a number of days that after the user receives the perk, then it will be removed from the user after that many days. This can be helpful for temporary perks that may be given to students or other users who may only be allowed to use resources in your studio for a certain amount of time.
If it is a monthly type of perk, you do not need to enter 30 days here. The monthly perks automatically renew every month. If you set it to expire after 30 days, the user would no longer have any perk after the 30 day expiration.
An example of using an expiration on a perk would be for an 8-week class, which would be 56 days (8 weeks = 56 days), is setting it for 57 days. Then the perk would expire one day after class completes.
How to Share Perks With Users:
Now you want to be able to share your perks with users.
1. Manually: One way to share perks with users is to manually set up user perks by user. Go to the Users tab and select all users. Click the name of the user you want to give the perk. Scroll down to the Perks area and click on Add User Perk. Now you can select from the user perks you have added for your studio and click add perk. Once you add it to the user you will now see the perk listed, when it expires, and whether it has been used by this user.
2. With Memberships: For studios using Kiln Fire’s membership feature, you can add user perks as a part of your membership plans. In the Kiln Fire app click on Studio. Then click on Membership Plans. When you Create New Plan Level, one of the things you can add is Plan perks. These perks are available from the User Perks you have already created. This allows you to give different perks to your different levels of studio membership. You can also click on a Membership Plan you have already created and update what perks you want to give to that level of membership. Important: When you change the perks in an already created membership plan, only new users subscribing to the plan will have the perk changes. Existing members on that plan will not see changes in their user perks.
3. Through Classes: If you are using our classes module you can automatically assign user perks with certain types of classes. Generally we recommend this for long-term multi-week classes if you have a need for students to do firing, make reservations, or do other activities in the Kiln Fire app as a User. To set this up you should go ahead and create your User perks (most likely a one-time perk for firing fees, checkins, or reservations). You may need to create multiple of them with different amounts or expirations that correlate with your types of classes. You can then edit your class templates, and near the bottom is an option for “Automatically Create Users”, you will want to switch this to “Create New or Find Existing Users”. This means that when someone signs up for a class, it will use their email address to either find an existing user or create a new one. Once you choose that option, additional options will appear below that give you the ability to assign them Tags automatically, and assign them user perks automatically. These user perks will have a start date that is 12 hours before the class officially starts.
4. Through User Tags: Another way to set up user perks is to use user tags. First, you want to create user tags within your Kiln Fire app. In Kiln Fire, click on the Studio tab. Find the User Tags icon and click on it. In this area you can “Add Tag”. You can create tags that you will assign to users like student, employee, etc. When you create a tag, you can assign all users with that tag to be able to have specific perks that you have created in the User Perks area. For example you might want all students to have 5 hours of studio time each month. After you have created tags with user perks, you can always go back to edit a tag by clicking on the tag name.
You can now add a tag to a user when they initially register in the app. In the Studio tab, click on user tags, and click User Sign Up Links. Scroll down to see User Sign Up Links. If you want to sign up a single user or a group of users with a specific tag, you can click Customize Link and click which tag you want those users to be labeled. You can then copy the custom link and send it to an individual or group of individuals.
Another way to add a tag to a user is in the Kiln Fire User tab. You can click on an individual user and under their name, click on +Add Tag. Click on the tag you want and click Add Tag(s). Remember when you add a tag to a user, they now have the user perks assigned to that user tag.
Multiple Firing Perks
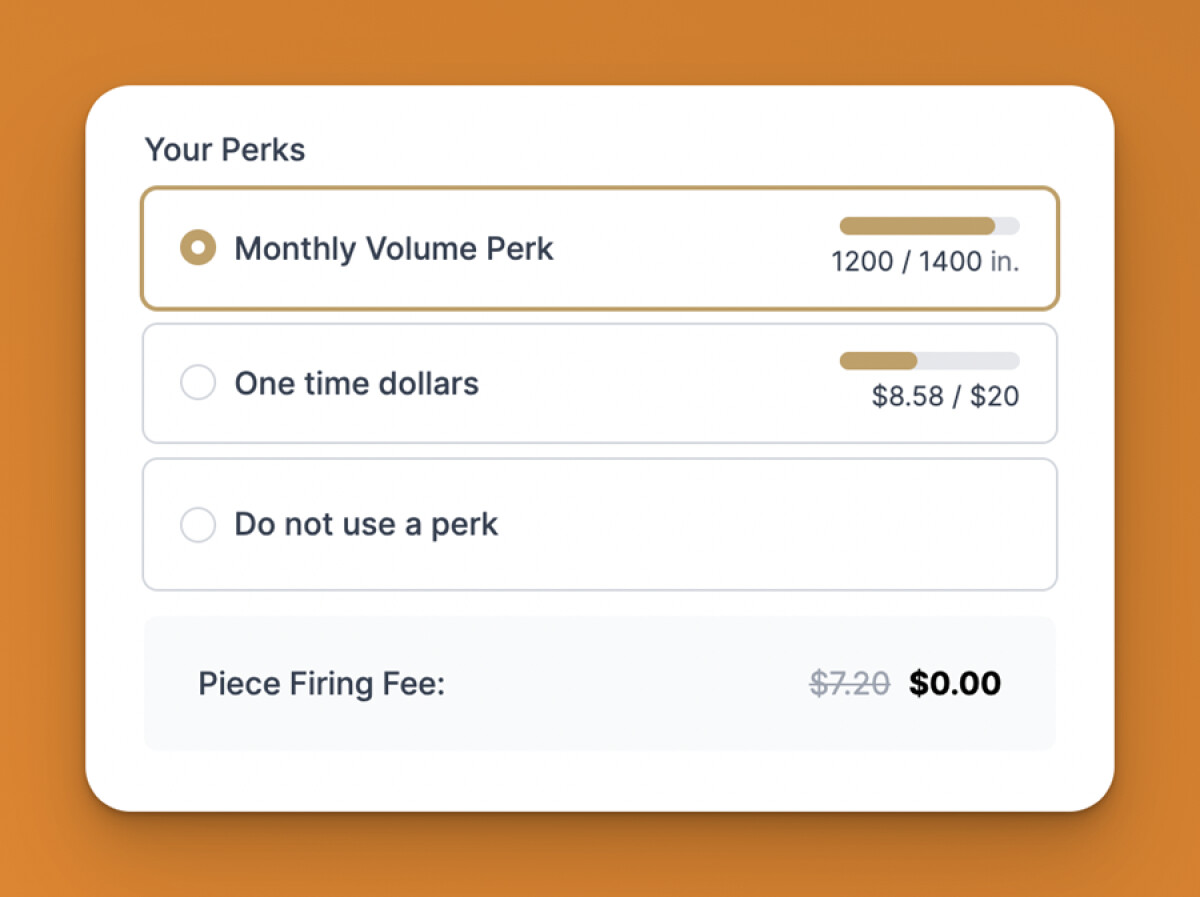
Users who may have acquired multiple firing perks, (maybe one from a membership and another from a class) will now be able to choose which one they want to use per piece. So if they are in class, and don't want to use up their membership perks first, they can choose the class associated perk as they submit their pieces.
In addition, because of the way firing fees are now stored, a piece can be partially covered by a perk! Here's some of the benefits from that:
- A user can "use up" the last tiny remaining amount of their firing perk and the rest of the firing fee would be calculated based on what is remaining after the perk is used.
- As a perk gets used for it's last amount, it can overflow into another similar perk! So, for example, if a user has 30 cubic inches of their membership firing perk left but a full class perk of thousands of inches remaining, the firing "fee" will be split between the two perks, using the remaining 30 inches and overflowing into a similar available perk.
- A user can see which perks were used for each firing fee and the amounts used when visiting the "View Piece" page.